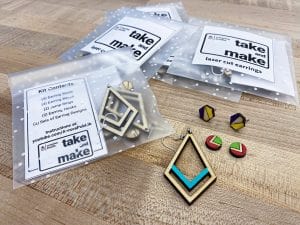
Many of you have been enjoying our Take and Make kits lately but have you ever wondered how they were created? Let's take a look at how we made the laser cut earrings kit; one of the first kits we've brought out!

Usually I would just get inspiration and ideas from the internet but the earrings idea was from a colleague. She showed me photos of laser cut earrings and asked me if I could make something like it. We also just got our laser cutter working too so this was the perfect opportunity to do some test runs on it. Challenge accepted!
The shape was easy enough to do so I hopped on to Illustrator and started to design away. It didn’t take long until I had something which I was happy with. Now onto the fun part!
I imported the designs into the laser cutter software and cut out a sample earring. It came out perfectly but there was just one slight problem. The hole where the earring hook goes into was too close to the edge of the wood. The outer wall became too thin and brittle to hold on to the hook. Darn!
I went back into Illustrator and made the earring just a tiny bit bigger to give the laser cutter a little more space to work with. I laser cut another sample and success!
Next step was to mass-produce these earrings! Our goal was to make 50 kits. Easily enough we laser cut them out which took no time at all (well compared to 3D printing at least!).
We packed them in cookie bags, put a label on it and released them into the wild!
We’re still releasing kits weekly so grab a kit or two and get making! Click the link below to see the kits available.
https://aurora.bibliocommons.com/v2/search?query=take%20and%20make


Add a comment to: Creating our first Take and Make kits